Tennis footwork drills

As part of our focus on ensuring a healthy body for tennis, we have devised ‘snack-sized’ workouts, each with 3-7 drills, that can be done anywhere in just seven minutes or repeated or combined for a longer overall workout. There are no longer any excuses for introducing a fitness regime into your tennis training.
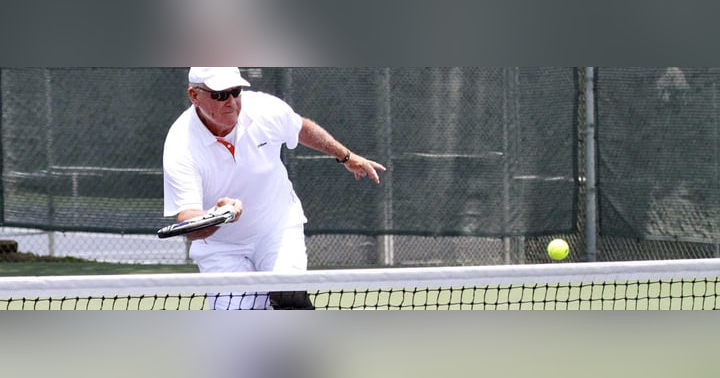
To play tennis at a high level, you must be able to move quickly on the court, in different directions (forward, backward, left and right, and diagonally), to stop quickly, and start again (without injury) - all while maintaining balance and using the proper footwork to get to the ball. And the good news is, like your forehand or backhand, footwork skills can be practiced anytime both on and off the court.
Importance of footwork drills
- Lack of proper tennis footwork makes it almost impossible to advance to higher levels of tennis play
- Even without true speed, by implementing proper footwork you can achieve a great deal in tennis
- Tennis does not require fast long strides but instead, it involves many small steps at high intensity
- Intensive footwork will help you adjust to the ball’s spin and bounce once you are near enough to make contact to ensure you feel more balanced and in control
- By creating the right distance from the ball, you will be able to use more of your legs and deliver more powerful and controlled shots.
There are many benefits to having high levels of footwork. That is why we designed this Super 7 workouts on footwork that will improve your overall speed and agility. Be ready to take your fitness and tennis game to the next level.
Equipment required
We recommend buying cones and a ladder to get the most from these drills. If your budget doesn’t allow buying equipment then worry not. You could use cans and some old rope as alternates.
Cones
These Super Z Outlet Bright Orange Round Cones (20 Pack) represent good value cones that can easily fit into your bag to take anywhere.
Ladder
Check out the SKLZ Quick Ladder. It is decent quality and easily portable for footwork drills. Or if budget allows, this high quality ladder is ideal for coaches.
Court marking
If you don’t have access to a court, or wish to do some of these exercises on a driveway (or similar) then get yourself some Gamma Court Marker Lines.
Ladder drills
Ladder drills are best performed with a racquet in your hands to mimic your movement and feel during a match. However, don’t sweat if you don’t have one, just visualize a racket in your hand. The overall time for the workout will depend on your intensity. The higher the intensity the better provided you can keep your quality of movement. Beginners should take a 30-second break after each set, whereas intermediate players might wish to take just one break after say three sets and Advanced athletes take no break. The optimum is to do all the drills, seven times in 7 minutes.
Forward (and backward) sprint
Difficulty: Easy
Stand at the end of the ladder facing the 'rung'. Goal is to put one foot in each rung as you sprint forward with pace and purpose. When you get to the other end turn around and come back. As an alternative, do the same but when you get to the other end, return backward being very precise in where you place your feet. For fun, if you touch the ladder itself, then make yourself do another set.
Lateral side step
Difficulty: Easy
Start at one end of the ladder with it directly beside you. Step in with one foot and then the other, between the 'rungs', to shuffle to the other end. Then facing the same way, go back in the opposite direction. Increase the intensity of footwork as you move while keeping the same degree of control and balance. For Intermediate and Advanced players, you can make this more intense by lifting your knees higher as you move.
Lateral in and out
Difficulty: Easy
Start at one end of the ladder (say left), with the ladder to your right side. Step into the ladder with your right foot, then step in with your left. Then step out with your right underneath the (far side of the) next rung, then out with left, then in with your right and then left. Continue to work across the ladder with purpose. When you get to the other end, come back the other way.
Forward in and out
Difficulty: Medium
Start at one end, facing the ladder. With both feet at a time jump to have one foot either side of the ladder rung. Then jump to have both feet inside the same rung. Now jump to have them outside the next rung, then jump to have them inside that same rung and so. Again, as a variation, return backward doing the same thing.
Ickey shuffle
Difficulty: Medium
You can either start with your left foot or right foot first. Be on your toes. If you are standing to the left of the ladder, step into the ladder with your right foot, followed by your left. Then step out diagonally on the other side with your right foot, then step into the ladder diagonally with your left foot, followed by your right. Then step out with left, then step into the next rung with your right, followed by your left. And so it goes on. The goal is to be fluid and fast. Now repeat all the way to the end. Turn around and repeat all the way back to the start. That is one set. Some people might better get the pattern of feet movement as: IN(right)-IN(left), OUT(right), IN(left)-IN(right), OUT(left), IN(right)-IN(left), etc. And for more agile players, try the Icky Shuffle going backward.
Jumping jacks
Difficulty: Hard
Facing the ladder, perform a jumping jack with your feet landing between the ‘rungs’ as you move towards the other end. Turn around and repeat back to the start.
Bunny hops
Difficulty: Hard
Jump with both legs (bunny hop) between the ‘rungs’ of the ladder to the end. Turn around and then bunny hop back. For Advanced Players, try to have negative splits with each set (meaning that you go a little faster on each set). Remember, to keep the quality of movement with balance and control.
Cone drills
You will need 10 (or 12) cones for these exercises, put them at equal distances across the court on the baseline from one doubles line to the other. More cones add more effort and difficulty. If you are doing it on a driveway or similar, then (space allowing) use up to 36 ft (or say 12 strides) to measure the overall distance and then spread out the cones equally. If you are a Beginner, we suggest using just half the court (18ft) and say 6 cones.
Weaving
Difficulty: Easy
Face across the court towards the far end of the cones. Weave through the cones using small sideways steps, moving slightly diagonally to the next cones, back and forth, until you reach the end. Then turn around and go back through the cones back to the start.
P’s & D’s
Difficulty: Easy
Face towards the far end of the cones slightly on the left side. You can do this from the right side too. Now move towards the next cone, go around it 360 degrees clockwise (to form a letter ‘P’) with a lot of little steps and then sprint forward to the next cone. Now, going around it with a lot of little steps. Keep going until you reach the end. Then either turnaround and go back the same or do the same backward. So, this time come down the other side underneath the cone in small steps, complete a 360-degree clockwise motion and then go straight back to the next cone.
Forward weave
Difficulty: Medium
Face the net to the left of the cones. Now, with small, intensive steps go back and forth in between each cone as you move right (always facing the net). When you get to the end, do the same thing back to the beginning going left.
Side shuffle
Difficulty: Hard
Stand one side of the first cone facing the court. This one is a great but hard drill. Side shuffle staying low on legs, you start a little behind the line of cones, start from one double line, shuffle to the first one, touch the cone, shuffle back, shuffle to the second one, touch the cone, shuffle back, all the way until cone number 10. Advanced athletes can achieve these four drills, seven times in 7 minutes without rest. It is recommended that Beginners should rest for 30 seconds after every pair of drills. Intermediate players can rest for 1 minute in between each circuit.
On court letter drills
These letter drills are all done on a tennis court - or alternatively, in an area like a driveway that is marked out like a tennis court. All of these drills are meant to be done multiple times. You can stick with one letter or combine them for fun. Beginners will need to take rests between after multiple drills.
‘T’ letter pattern
Difficulty: Easy
T is for tennis and Tennisletics. Start in the middle of the baseline facing the net. Turn and run to the left singles line, turn back towards the net and side shuffle back to the middle, then turn and run to other singles line, face the net and side shuffle back to the middle. Now, sprint forward and touch the net and back paddle toward the middle starting position. That is one (inversed) letter ‘T’.
‘I’ letter pattern
Difficulty: Easy
Jog on the spot in the baseline for 20 seconds facing the net, then sprint to the net, then back peddle back to the baseline still facing the net. Now jog in place for 20 seconds and so on.
‘H’ letter pattern
Difficulty: Medium
Jog in place at the intersection of the baseline and the left singles line for 20 secs. Now sprint forward to the net, then back peddle (still facing the net to the service line), now shuffle across to the right singles line. Then sprint to the net, and back peddle to the baseline and jog in place for 20 seconds. That is half the drill. Now, repeat in reverse and end up back at the starting position. Beginners will need a rest at this point. Intermediate can jog in place for 40 seconds and continue. Advanced athletes can continue without a break and complete 3-5 sets. Advanced athletes can also make this drill more difficult by using the doubles line instead of the singles.
‘Z’ letter pattern
Difficulty: Hard
Stand at the net by the left singles line. Now shuffle right to the far singles line, then sprint to the opposite single line at baseline, turn to face the net and side shuffle right to the single line. Now sprint to the left net position where you started from and begin again. If needed, you can jog in place at any turning point to catch your breath. And Advanced athletes can widen the ‘Z’ by using the doubles line. An alternative is to do the drill in reverse starting at the right net position and created a stylized ‘S’ pattern.
Disclaimer
At Tennisletics, we recommend ‘common sense’ when embarking on any exercise regime. If you have any doubt, you should check with your doctor before beginning any of our suggested workouts and drills or following any fitness program that, by their nature, you are performing at your own risk. We have made all reasonable efforts to create this content. Tennisletics, LLC will not be responsible or liable for any injury or harm you sustain as a result of our fitness blogs, videos, or any other information shared on our website or apps.

Aleks Szymanski
Founder
Tennisletics founder, business leader, entrepreneur, tennis fanatic, coach, and veteran military pilot.

Chris Haggard, Former World No.19